Creating Patterns That Tell a Story: A Behind-the-Scenes Look at My Design Process
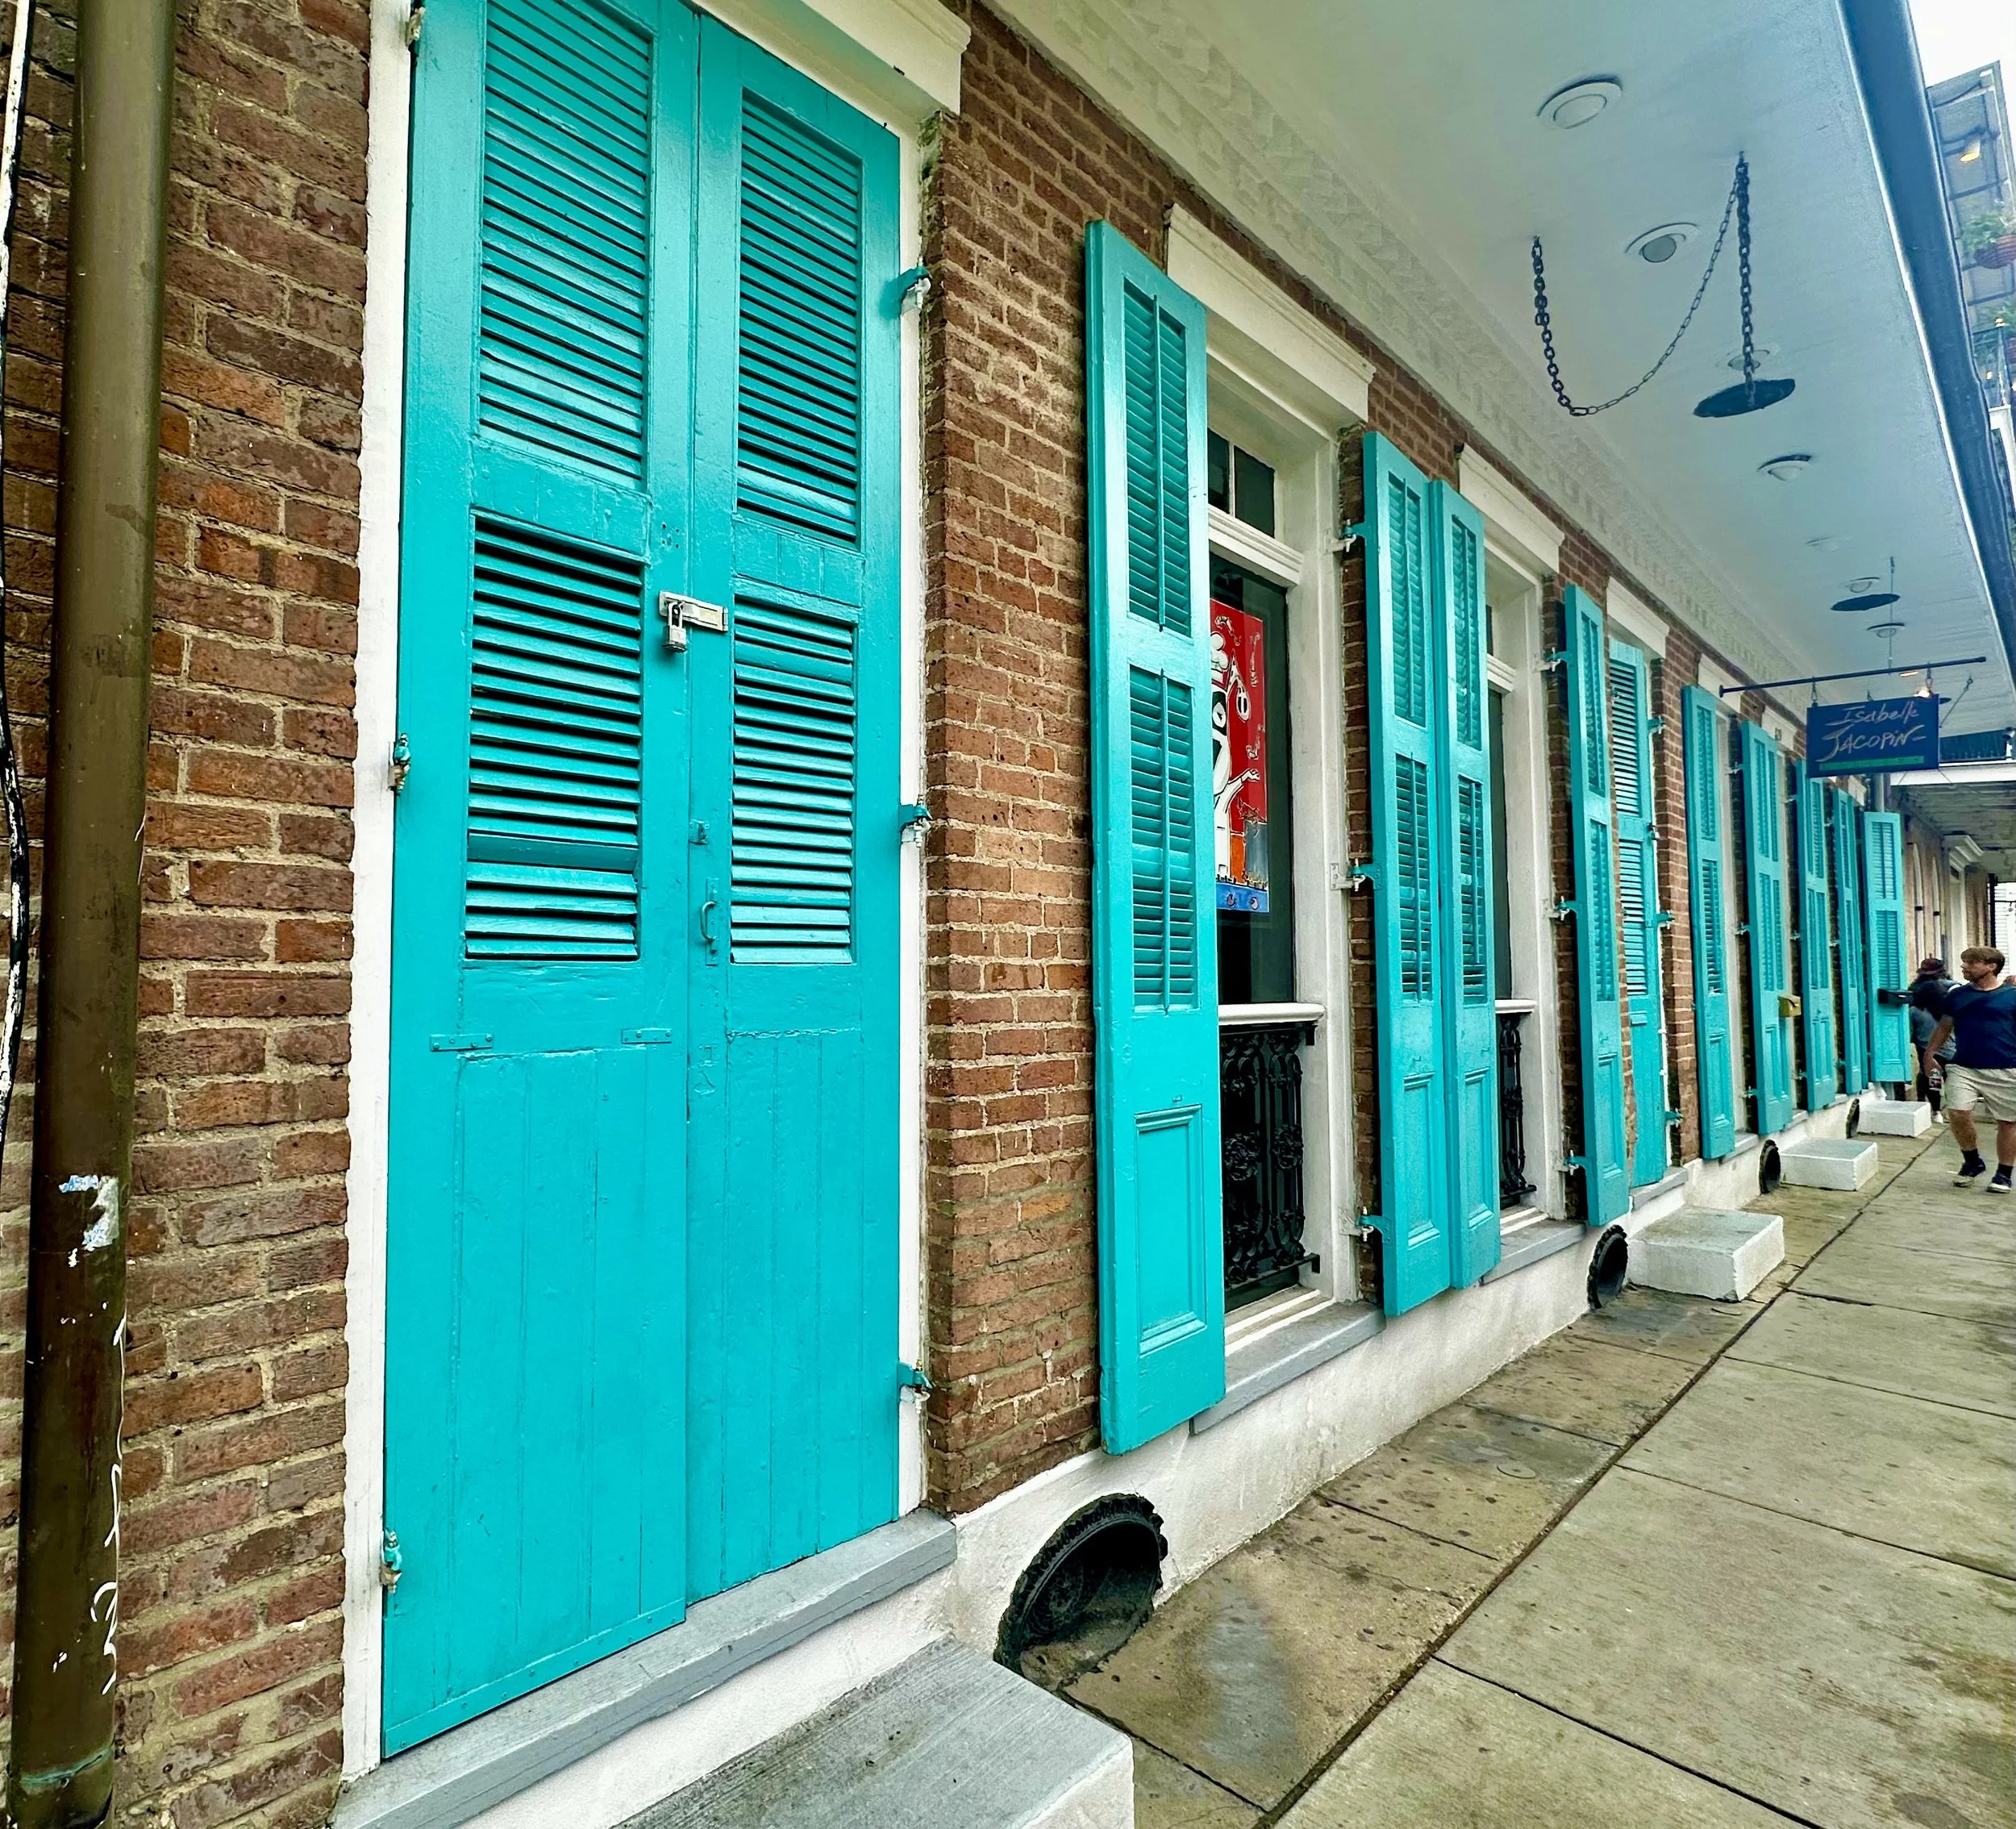
Surface Pattern design story telling in New Orleans. Inspiration starting points are everywhere
Every pattern I create has a backstory; every idea comes from a point of inspiration. From the smallest doodle the most vibrant repeats evolve. My surface pattern designs are little pieces of narrative — shaped by moments, emotions, and inspirations that beg to be transformed into something lasting that adds beauty and decoration to the world. In this post, I’m pulling back the curtain to share how my designs come to life at Krafty Chameleon, and how storytelling guides every step of that journey
✨ Why Story Matters in Surface Design
Whether it’s a wallpaper bursting with florals, a fabric filled with whimsical creatures or stationary decorated with art deco glamour, great pattern design needs to do more than look pretty. It should feel meaningful. The most effective designs have a reason for being there; the most memorable patterns start with a story — something that connects emotionally, evokes curiosity and sparks imagination and that can be responded to.
At Krafty Chameleon, I treat every pattern like a visual tale. Sometimes it’s a dreamy escape back to a place I’ve travelled, other times a response to a feeling or piece of music or even a quiet moment in the garden.
🌀 Step 1: Gathering Inspiration & Ideas
It all begins with a connection — something I see, hear, or feel that sticks with me. A colour from a Moroccan tile, the shape of a flower in the garden or a rhythm from a ballroom track. I jot down words, collect references, and take a moment to figure out what this pattern wants to say. I also at this point start to have a rough idea of where I think it might lend itself to being used. This can often change through the evolution of the design but having a starting point is really helpful.
Sometimes I build mood boards from photos I’ve taken, colour combinations I am responding to and sketches of pattern layouts that I have in mind, This is always a really fluid stage of the process. I know what I am inspired by but not necessarily what form that inspiration is taking or the direction I’m going to follow it in. It’s a lot of scribbling, note taking and most importantly pivoting, This is not a point to be locked to anything; it’s an exploration of thought. I would estimate about 80% of the time the final pattern is a long way from the first starting words and references at the commencement of step 1. I love to lay the final design next to the starting point; its such a reminder of how the pathway is rarely the one you think you’ve set off on.
✏️ Step 2: Sketching & Exploring
Next comes the loose sketching stage. This is where I test out motifs, shapes, and ideas — letting things evolve naturally. I almost always draw digitally because it enables me to sketch the most loosely without the fear of “mistakes”. I find a draw with a far more natural hand digitally; my perfectionism is fed when I draw on paper and I feel every mark has to be the correct one.
A looseness with no preset direction is so important at this point. For me its about finding our what wants to come to the forefront and what is the most effective response to the inspiration. Sometimes it’s a tiny motif or a cute character; other times it’s a stand out flower head or a free flowing shape. I keep everything while I’m on this explorative ride because you never know where all the pieces will fit together and what you might pull on later or for another piece within the collection.
I think of the output as a library of reference points and motifs, both for this collection but also for future collections where I might piull on something that didn’t get used and interpret it completely differently. Nothing is ever wasted or discarded.
This stage is playful and messy on purpose — a space where I can explore without judgment.
🎯 Step 3: Choosing Motifs & a Visual Storyline
Once the ideas start to take shape, I choose which elements to carry forward into the initial draft of the design. This is where storytelling starts to become more intentional. I think about:
What elements best represent the feeling or message I want to convey?
Is there a hero motif that stands out that I know I want to make the centrepiece of the design?
How do supporting motifs help build the narrative?
What is the essence of my inspiration and is it captured by the motifs I am working with?
Is there anything missing but equally am I trying to incorporate too much?
Each pattern tells its own tale — whether it’s whimsical, elegant, nostalgic, or bold and the selection of the motifs are essential and central to that narrative. It’s often at this point that several stories present themselves and what was an original single pattern starts to diverge into several pieces for a collection. Each one telling its own story but collectively together bringing the magic and narrative.
🧩 Step 4: Developing the Repeat
With my motifs in place, it’s time to build the repeat. This is the technical part — where art meets structure and maths. It’s also the most exciting piece of the process for me. The most unexpected (in good and frustrating ways!) things can happen at this point. Sometimes you get the most magical results when you repeat the base unit out and other times things bump into each other, land on top of each other and there’s a whole lot of wiggling and moving of elements to do to give it the space and proportions necessary for the design to come through
I choose between straight, half-drop, or more complex repeats depending on the design. My default style is something more complex as that is what I am naturally drawn to when working but I like to challenge myself to keep bringing variety so as to have a vibrant and cohesive but not predictable portfolio of work.
Creating the repeat is like building a puzzle where everything must fit seamlessly — there can’t be any overlaps, gaps, or awkward clusters and everything needs to have breathing space and a spot to nestle where is not only makes sense but adds to the overall design. ITs not just the motifs themselves that need to sit right but also the negative space around them and that they create between each other. Getting this right makes all the difference, especially for fabric, wallpaper, or packaging use.
This is the step that can take many hours of playing with the layout. The repeat may well work on a first attempt but it is rarely perfect. There may be elements that are too close to others or areas of negative space that create visual “ditches that run across the pattern. Sometimes you can still see the original shape of the repeating unit too clearly and the design looks blocky and with something disrupting the flow of the eye. I often have to park a pattern at a certain point through this step. Give it some time and space and come back to it in a few days. Often a bit of a break and a fresh perspective really helps with finding a natural balanced layout and not one that’s been wrestled and tortured into place.
Don’t be afraid to pause and put down a piece during the repeat building stage. It is not failing or giving up it is just allowing the piece to develop in your imagination and find its voice. When you pick it back up you will more than likely find the answer straight away; something that you could have slaved for hours trying to find before and never got to.
I firmly believe if the layout doesn’t present itself as 80% complete within the first hour of working on it then it’s time to give it a pause and come back at another moment. For this reason I have numerous patterns on the go at any one time.
🎨 Step 5: Colouring with Purpose
Here comes one of my favourite parts: colour! I choose palettes based on mood, brand fit, and trend inspiration. Colour is where personality comes through — and where a pattern can shift from romantic to modern, or soft to punchy, just by changing the tones. The same design could move from Mediterranean freshness, to Mojave desert aridness through to a tropical botanical garden just based on the choice and placement of colour.
I will almost always test several colourways, for a pattern. First and foremost to try and identify its most powerful and effective voice but also to see whether subtle changes can create almost a whole new pattern. Imagine a strongly outlined graphic piece where you make those outlines the same colour as the background; suddenly a whole different shillhoutte pattern effect emerges. The possibilities are endless and this is a step I enjoy spending time in; reworking, reimagine and thoroughly enjoying the process.
Offering alternative colour ways is especially important if the pattern will be used commercially. Having two different approaches presents a collection in different lights and opens it up to different audiences. It might be a warm and cool version, or a spring and fall interpretation or perhaps a vintage cottagecore feel with something more retro and zingy as an alternate.
I colour in two very different ways at this point in the process. Above is the considered and planned approach to pulling together effective palettes with contrasting colours and then working out how to make the design sing. My second pattern comes purely from an emotive response. I colour the pattern on my iPad as if it was a colouring book. I use it as a mindful connection moment and repeat that three or four ways. I can then sit back and analyse whether the output is effective. I would say 70% of the time something that I have coloured on instinct speaks in a stronger voice than an element I have planned and it gives me a new direction to work with. Not everything is successful but I find this approach helps me both keep the fun in the process and also stops me from over planning and analysing this beautiful and instinctive part of the process, some of my best ideas come when I work purely from emotion and instinct when playing with colour.
📦 Step 6: Final Touches & Presentation
Once the repeat is perfected and the colour ways are locked in, the refining work starts. That means cleaning up lines, adjusting alignment, and preparing files in formats that are ready for print-on-demand platforms, product manufacturers, or creative clients. This can often be the longest part of the process and usually takes a good deal of fiddling, walking away, pondering and testing to land on the exact final version. There often isn’t one single answer either, one or two options might present themselves and then its a matter of emotional choice and that can be a tough one to call.
Depending on the client and how the pattern is going to be used or promoted, I might also prepare mock-ups to help with visualisation of the pattern on products or in interiors. That’s a really fun part of the process; seeing a pattern move from an Illustrator document to on a living room wall or a wrapped gift is really exciting. It shows the possibilities and never stops giving me a creative dopamine fix. There are times that when put on a mock up there are elements that either don’t work as well as they appear to on a flat screen or that shout there’s another option that would be even more fabulous. Its not unusual for a pattern to make a few loops through this sixth step before the final version is ready to go to a client.
There’s something very exciting (and to be honest a little bit terrifying) about sharing a pattern or a collection for the first time with a wider audience. That nervousness never seems to fade. Its so exciting to let other’s see what you’ve been working on
💬 Why It’s More Than Just Pretty
My design process is about more than creating attractive patterns; — it’s about building collections with feeling. Whether I’m collaborating on a bespoke design or licensing a ready-to-use collection, I want each pattern to bring beauty, meaning, and story into someone’s space.
🌈 Connect with me to chat creative journeys, colour palettes, or potential projects: rachelanne@thekraftychameleon.com

Balkans flower fields, Corfu filed courtyards, Louisiana foliage and National Trust house upholstery. Different inspiration points lead to wildly different stories